

Setting up a NodeJS Application
NOTE: This guide is tailored for Node.js developers who are looking to start working with cPanel.
We provide access to the NodeJS Selector for advanced developers but we don't provide any support relating to the NodeJS Selector or the debugging of NodeJS Applications.
Setting up a Node.js application in cPanel is straightforward and can be done by following these steps:
- Access your cPanel account.
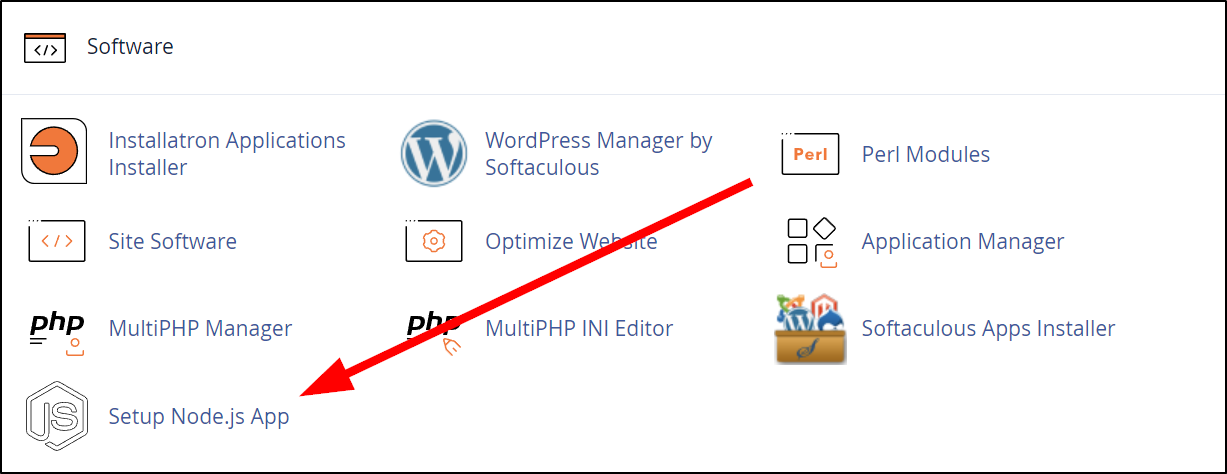
- Locate and select the Node.js App option under Software.
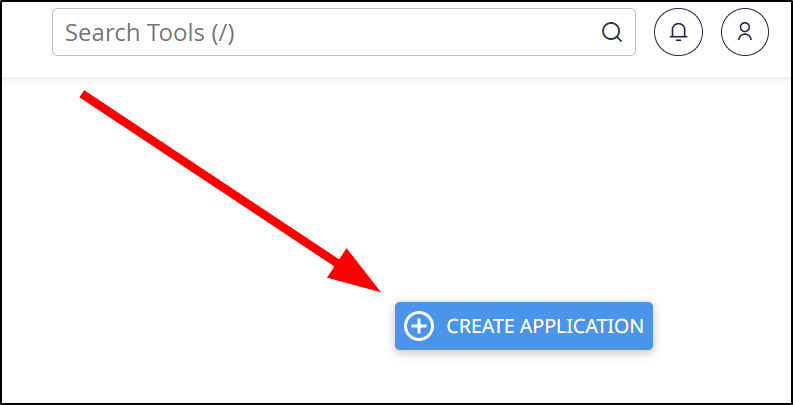
- Click on Create Application.
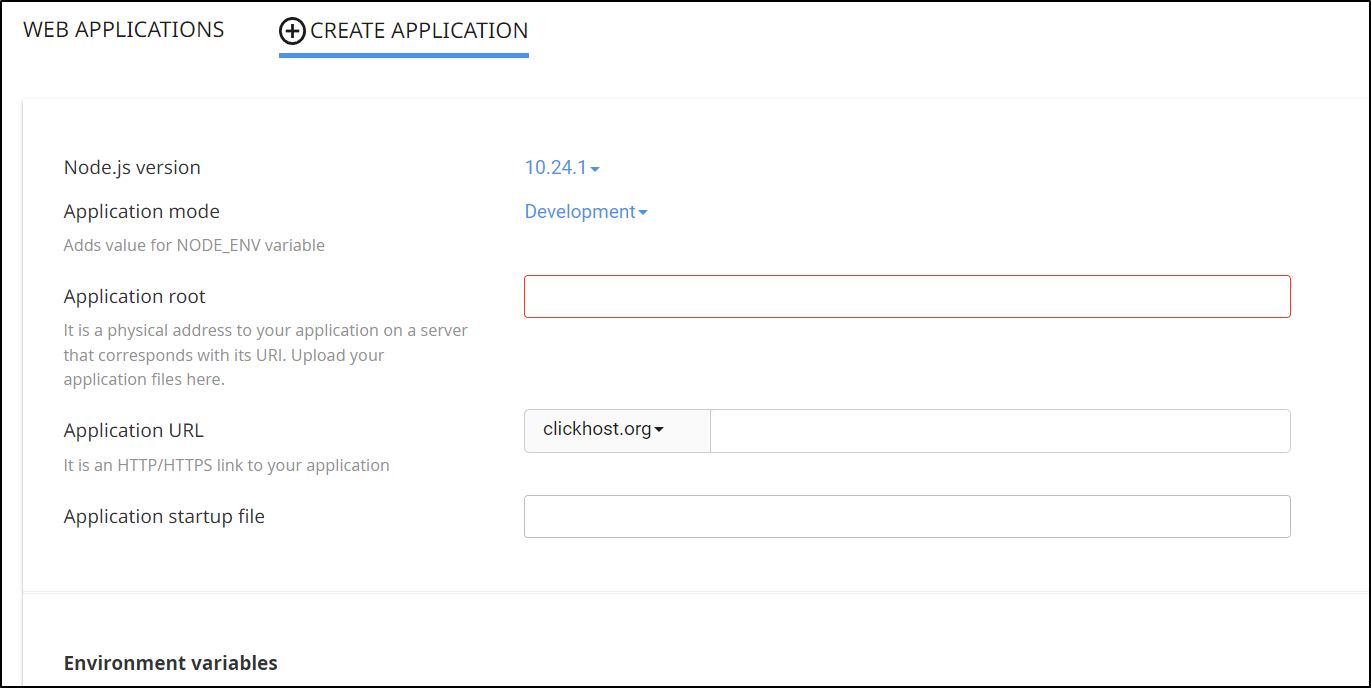
- Choose Node.js Version: You have the option to select from the available versions in the drop-down menu.
- Application Mode: Development and Production modes are available.
- Application Root: Define the file/folder path for your application.
- Application URL: Specify the URL where your application will be accessed from.
- Application Startup File: Enter the desired name for your application's main startup file.
- Passenger Log File: Set the filename for the Apache Passenger Log file.
- Click on Create.
Managing Your Application via Terminal
cPanel provides a virtual environment for your Node.js application, which you can access through SSH using the following steps:
- Log in to your cPanel account.
- Go to the Node.js App under Software.
- Click on the Edit option (the pencil icon) next to your application.
- Locate the command starting with source next to "Enter the virtual environment. To enter the virtual environment, run the command" and copy it.
- Access your account via SSH.
- Run the copied command to enter the Node.js application's virtual environment.
